Since we have two fun holidays coming up, I thought I’d work on some Easter and St. Patrick’s designs today. First, some Easter stuff.


I have to credit for this bunny design to Daizy Design. I’ve mentioned her before. She is amazing! Be sure to check her out.

So, that was supposed to be an Easter egg in the middle of her forehead, but I didn’t get the shape right. Oh well.

Here is a fun little shamrock tribal. I used glitter, but you could go without for a boy or a man.

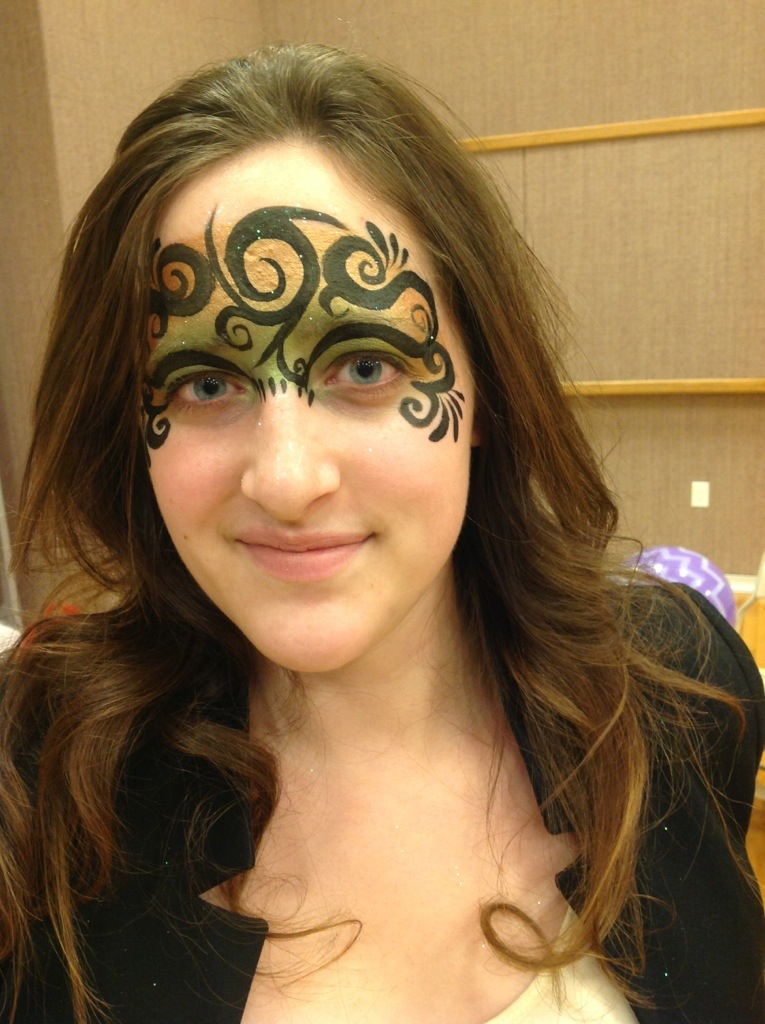
I also wanted to do a Celtic knot mask, and since I was in the mood, I did a step by step. First, the finished product:

Step 1: use a green one stroke cake to make a petal in the middle of the forehead and some frills around the eyes.

Step 2: use a gold split cake (this is old gold and copper by tag) to add another layer of petals and some more color on the corners of the eyes.

Step 3: come back in with your green to add the final tier of petals.

Step 4: Add a Celtic knot as a centerpiece. You can be as simple or elaborate as you want. Since I am painting on myself, I kept it really simple. Paint the knot with dark green or, if you want to skip the next step, black. At this stage, I also added a few dark green teardrops to add depth to the finished design.

Step 5: Add outlines, shadows and highlights to the knot to make it stand out. This is what will really make it pop.

Step 6: Add teardrops, swirls, dots and other embellishments in black to create the desired shape and look. For a guy, use tribals. Add some white at the end to create a polished look.

I’d love to see your takes on this design. Let me know if there a any other step by steps you want to see on the blog.

 Scroll down to see my latest work.